반응형
이 전 글을 이어서 나머지 이동관련 스크립트들을 마저 작성하겠습니다.
생성한 캐릭터에 헤더 파일로 이동하여 다음을 추가했습니다.
	/** 카메라 붐에 위치를 캐릭터 뒤로 위치시킬 카메라 팔을 생성합니다. */
	UPROPERTY(VisibleAnywhere, BlueprintReadOnly, Category = Camera, meta = (AllowPrivateAccess = "true")) // visible only in bueprint
	class USpringArmComponent* CameraBoom;

	/** 캐릭터를 따라다니는 카메라를 생성합니다. */
	UPROPERTY(VisibleAnywhere, BlueprintReadOnly, Category = Camera, meta = (AllowPrivateAccess = "ture"))
	class UCameraComponent* FollowCamera;

	/** 카메라에게 알리기 위해 회전과 위를 바라보는 값을 저장합니다.*/
	UPROPERTY(VisibleAnywhere, BlueprintReadOnly, Category = Camera)
	float BaseTurnRate;
	UPROPERTY(VisibleAnywhere, BlueprintReadOnly, Category = Camera)
	float BaseLookUpRate;

    	/** 회전하기 위해 지정한 rate에 따라 인풋을 통해 호출됩니다. */
	void TurnAtRate(float Rate);

	/** 위/아래를 보기 위해 지정한 rate에 따라 인풋을 통해 호출됩니다. */
	void LookUpAtRate(float Rate);


	FORCEINLINE class USpringArmComponent* GetCameraBoom() const { return CameraBoom; }
	FORCEINLINE class UCameraComponent* GetFollowCamera() const { return FollowCamera; }
다음은 CPP 파일로 이동합니다.
생성자에 다음을 추가합니다.
	// 카메라 거치대를 생성해 줍니다.
	// #include "GameFramework/SpringArmComponent.h" 헤더파일 추가
	CameraBoom = CreateDefaultSubobject<USpringArmComponent>(TEXT("CameraBoom"));
	CameraBoom->SetupAttachment(GetRootComponent());
	CameraBoom->TargetArmLength = 600.f;			// 거치대에 길이입니다.
	CameraBoom->bUsePawnControlRotation = true;		// 카메라가 캐릭터와 독립적으로 회전하게 해 줍니다.

	// 플레이어를 따라다닐 카메라 입니다.
	// #include "Camera/CameraComponent.h"  헤더파일 추가
	FollowCamera = CreateDefaultSubobject<UCameraComponent>(TEXT("FollowCamera"));
	// 생성한 카메라를 거치대에 끝 부분에 위치하게 합니다.
	FollowCamera->SetupAttachment(CameraBoom, USpringArmComponent::SocketName);
	FollowCamera->bUsePawnControlRotation = false;


	// 임시로 설정 나중에 제거
	BaseTurnRate = 65.f;
	BaseLookUpRate = 65.f;

	// Controller 가 회전할때 캐릭터에 회전을 막습니다.
	bUseControllerRotationPitch = false;
	bUseControllerRotationRoll = false;
	bUseControllerRotationYaw = false;

	// 캐릭터가 현재 물리적으로 움직이고 있는 방향을 자신의 앞 방향으로 지정하고 회전하게 합니다.
	// #include "GameFramework/CharacterMovementComponent.h" 헤더파일 추가
	GetCharacterMovement()->bOrientRotationToMovement = true; // 인풋으로 들어온 값에 방향으로 움직입니다.
	GetCharacterMovement()->RotationRate = FRotator(0.f, 740.f, 0.f); // 회전 속도값 입니다.
	GetCharacterMovement()->JumpZVelocity = 550.f;// 점프 높이
	GetCharacterMovement()->AirControl = 0.2f;	// 공기 저항
다음은 Rate 함수들을 구현해 줍니다.
void APlayerCharacter::TurnAtRate(float Rate)
{
	AddControllerYawInput(Rate * BaseTurnRate * GetWorld()->GetDeltaSeconds());
}

void APlayerCharacter::LookUpAtRate(float Rate)
{
	AddControllerPitchInput(Rate * BaseLookUpRate * GetWorld()->GetDeltaSeconds());
}
그 후 바인딩 해 줍니다.
	// 점프
	PlayerInputComponent->BindAction("Jump", IE_Pressed, this, &ACharacter::Jump);
	PlayerInputComponent->BindAction("Jump", IE_Released, this, &ACharacter::StopJumping);
	// 회전
	PlayerInputComponent->BindAxis("TurnRate", this, &APlayerCharacter::TurnAtRate);
	PlayerInputComponent->BindAxis("TurnUpRate", this, &APlayerCharacter::LookUpAtRate);
다음은 프로젝트 셋팅에서 인풋을 맵핑해 줍니다.
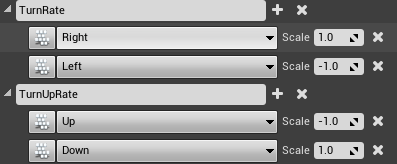
이후 캐릭터에 메쉬를 추가해서 플레이 해 보면 잘 움직이는 것을 볼 수 있습니다.
메쉬 추가 방법
지금까지 작성한 클래스를 우 클릭 후 블루프린트 생성을 클릭합니다.
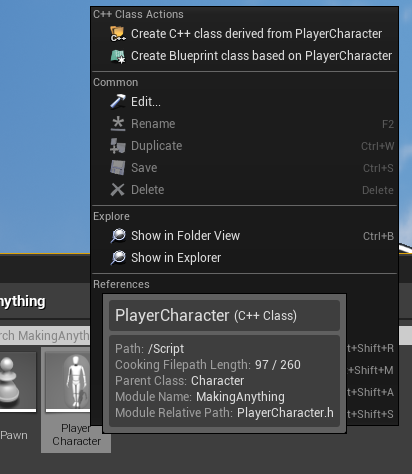
그후 경로를 지정하고 선택을 누르고 나온 후
생성한 블루프린트를 열어줍니다.
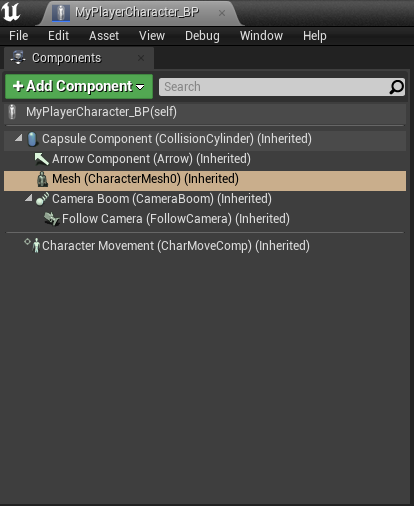
왼쪽 상단에 메쉬를 선택하고 오른쪽에 디테일 탭으로 들어갑니다.
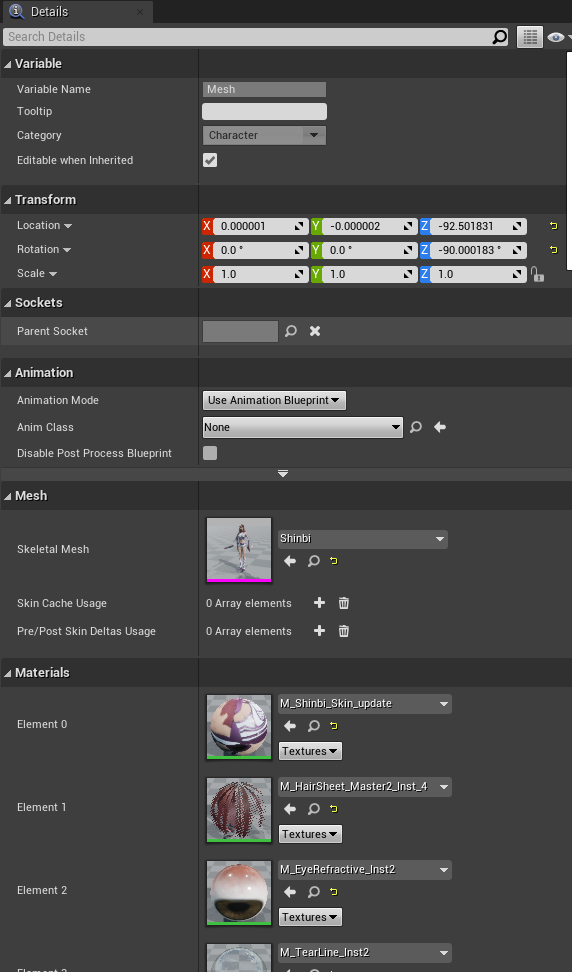
Mesh 프로퍼티에서 지오메트리 액터를 추가해도 무방합니다. 저는 Unreal 에서 제공하는 펜타곤 캐릭터 Shibi를 사용했습니다.
이제 게임을 플레이 해보면
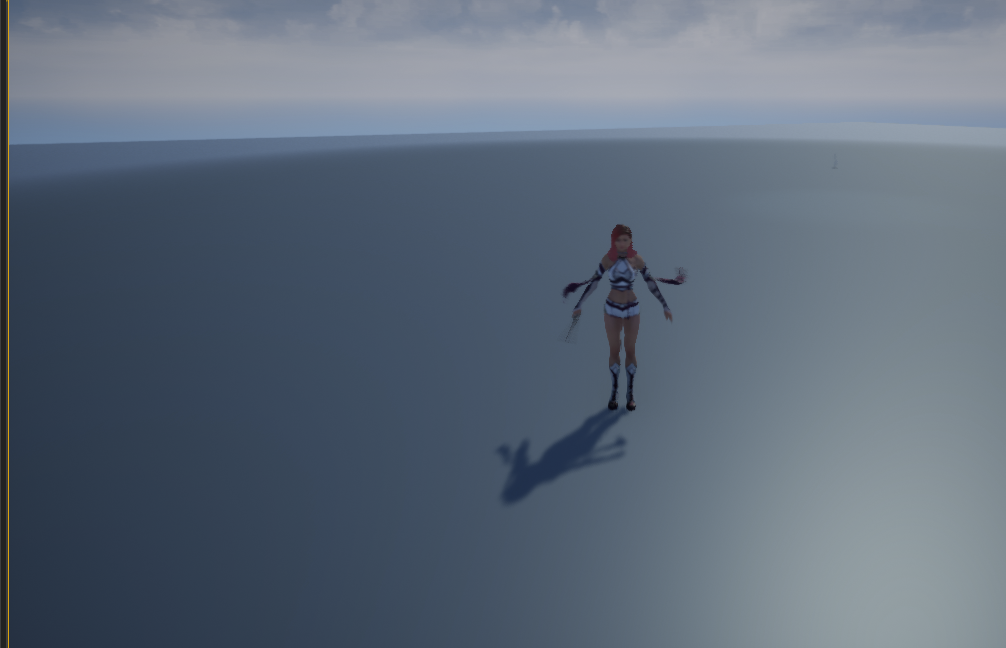
정상적으로 작동합니다.
이 코드에 사용된 함수들과 변수들은 아직 명확히 이해하기 힘들지만 여러 기능들을 추가해 보면서 대략적으로 이해하는게 중요한 것 같습니다.
다음은 애니매이션을 추가하여 input 에 따라 다양한 스킬들을 사용해 보겠습니다.
반응형